Issue Description
On a particular site, the Contact Center was offering a call to two different agents. Once answered, one agent would get the call and the other would get dead air.
Cause
This was due to a race condition caused by an improper configuration. Their Availability Tiers were configured to activate at the exact same time a Queue Timeout was set to happen. Thus the call would be offered to the next Availability Tier at the same time it was being sent to a new group.
Resolution
Adjusting either the Availability Tier timing or the Queue Timeout will resolve the issue.
You can read more about Availability Tiers and their configuration here.
You can read more about Queue Timeout and its configuration here.
Steps to change the timing
- Availability Tiers
- Open Chronicall
- Click the “Multimedia Configuration” tab on the left-hand sidebar
- Click “Skill Management” in the drop-down menu that appears
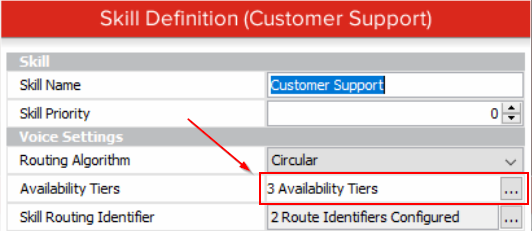
- Click on the ellipsis button above the Skill you would like to adjust
- Click the ellipsis button next to “Availability Tiers”
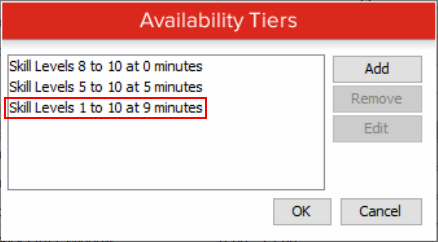
- A new pop-up window will appear that will allow you to Add or Edit the availability tiers
- Click on the tier you would like to adjust and select Edit
- E.g.
- This Skill has its last Availability Tier set to 9 minutes
- This Skill has its last Availability Tier set to 9 minutes
- E.g.
- Set how many minutes you would like to wait until another skill level is available in the queue
- NOTE: You must set at least two availability tiers and the first availability tier will force you to do 0 minutes. This is to ensure that someone is immediately available to take calls in the queue
- Save your changes by selecting OK
- Queue Timeout
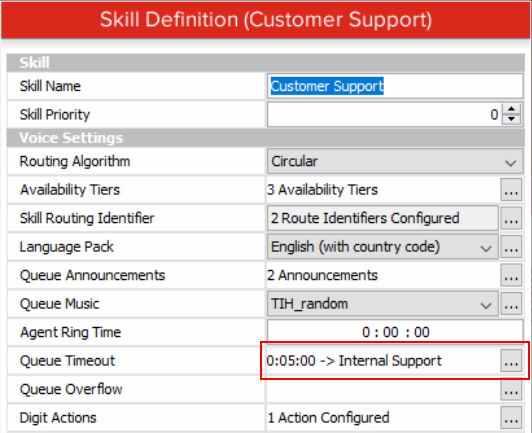
- Within that exact same Skill, find the "Queue Timeout" option and click on the ellipsis
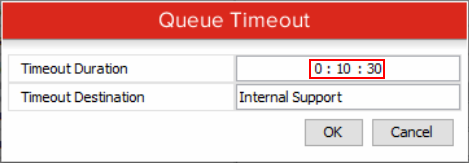
- Adjust the "Timeout Duration" setting so that it does not match the timing of any Availability Tier
- E.g.
- Due to the 9 minute "Availability Tier" set in our earlier example we have adjusted the "Timeout Duration" to be 10 minutes, 30 seconds
- Due to the 9 minute "Availability Tier" set in our earlier example we have adjusted the "Timeout Duration" to be 10 minutes, 30 seconds
- E.g.
- Select OK on that menu, then OK again on the next menu, and finally Save to save out your configuration change
- Within that exact same Skill, find the "Queue Timeout" option and click on the ellipsis