Overview
Chronicall's Multimedia and Avaya Call Reporting Contact Center works with the IP Office and Voicemail Pro to route calls to your liking. The steps below demonstrate how to configure the IP Office and Voicemail Pro to send calls to the Contact Center (Multimedia).
Note: This article assumes Contact Center (Multimedia) has already been installed. If it has not been installed, please see this guide.
IP Office
The IP Office needs to be configured to send calls to the Contact Center (Multimedia). We do this by creating IP Office Users with SIP extensions and placing those Users within a Hunt Group.
Note: Depending on your configuration, you may want to allow your agents to place a call on hold without receiving another call. The steps to do so are found in this Best Practices guide.
Users and Extensions
Purpose: To create new User accounts in Avaya IPO for each 3rd Party IP endpoint or in the case of ACR, the Avaya IP endpoint license.
Once created, assign the User accounts to actual SIP extensions or create new SIP extensions so that Contact Center (Multimedia) can route calls to the actual agent.
- Open Avaya IP Office Manager
- Pull a local system configuration
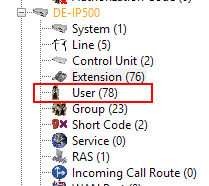
- Navigate to the User menu under the IP Office that Contact Center (Multimedia) will be using
- Either create a new User for each license of an Avaya 3rd Party IP Endpoint you wish to assign to Multimedia, or create one new User and stack the licenses (see Step 8 in this section for further explanation)
- NOTE: If ACR (Avaya Call Reporting) OEM, you will only need one new User to configure for the Avaya IP endpoint license
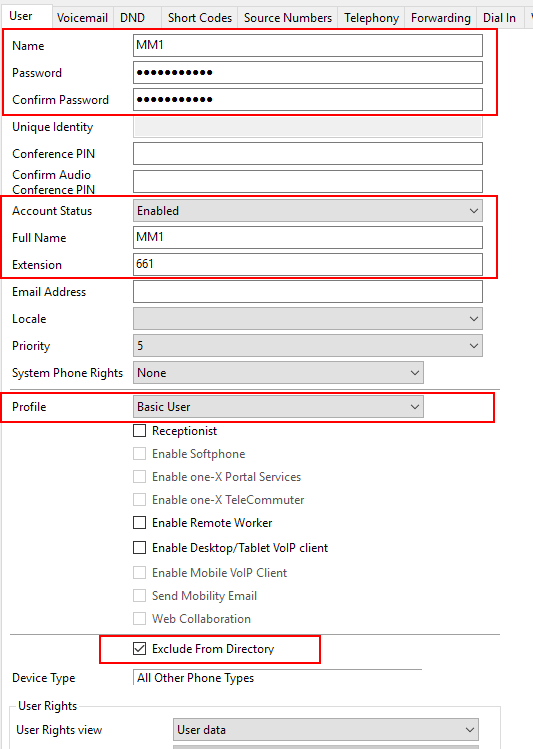
- Create the following settings in the new user's User tab:
- Create a Name
- Create a Password if you like, though for Contact Center (Multimedia) handsets this one doesn't matter
- Re-enter the password in the Confirm Password field
- Account Status set to Enabled
- Full Name repeats the entry in the Name field
- Extension that Multimedia/Contact Center will use
- Profile drop-down set to "Basic User"
- Select Exclude from Directory
- In the Voicemail tab
- Remove "Voicemail On"
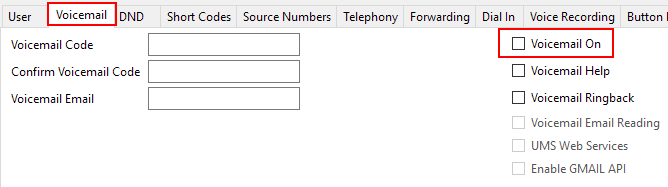
- Remove "Voicemail On"
- In the Telephony tab
- Under the sub-tab of Call Settings
- Select "Call Waiting On"
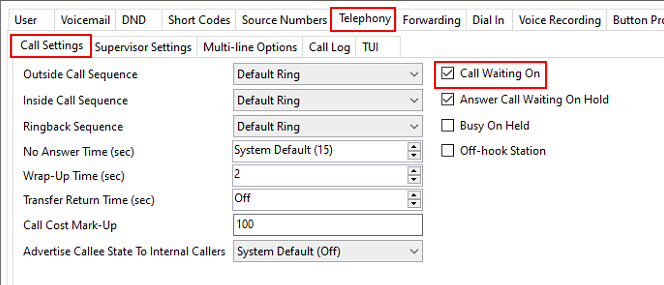
- Select "Call Waiting On"
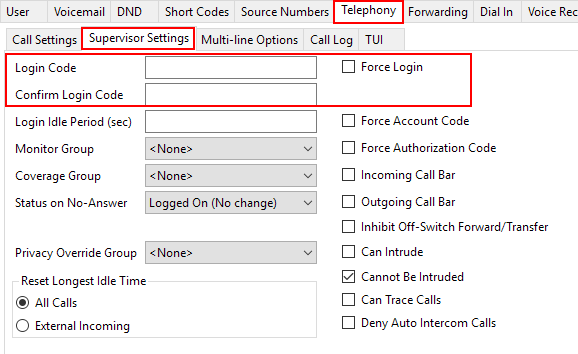
- Navigate to Telephony > Supervisor Settings
- Enter a Login Code and Confirm Login Code
- This is the password you will use in Chronicall to link the SIP Extension
- Also make sure that Force Login is unchecked
- Under the sub-tab of Call Settings
- If you have multiple End Point Licenses please refer to the IP Office Configuration section of our Single/Stacked SIP Extension guide to stack the licenses on one Contact Center (Multimedia) extension
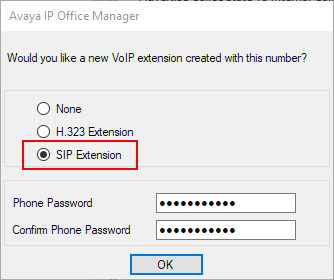
- As you hit OK to add a new User, you will be prompted to add a new VOIP extension to be created and assigned to that User account. Select SIP Extension and select OK
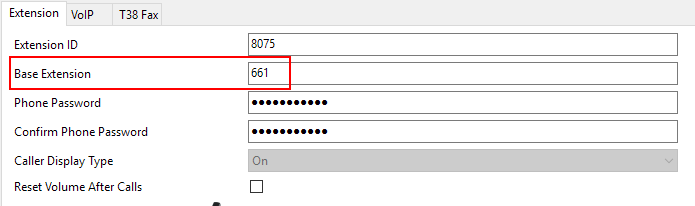
- Go to the new SIP Extension that was created. Verify that the User account that
you created is assigned to the SIP Extension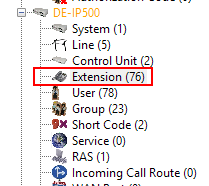
- Click on the VoIP tab and select from the Reserve License dropdown the option: ‘Reserve 3rd party IP endpoint license’
- NOTE: If using Avaya Call Reporting please use 'Reserve Avaya IP endpoint license' instead
- Finally, make sure that the Re-invite Supported option is de-selected along with unselecting"Allow Direct Media Path"

- Save your changes
Application User Rights
Note: Only use with ACR (Avaya Call Reporting) Contact Center or when stacking end-point licenses
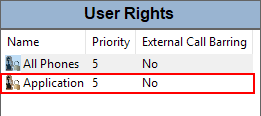
The prospective Contact Center (Multimedia) extension user(s) must be part of a User Rights Group with the option “Application Servers Group” checked.
- Navigate to the User Rights menu

- If there is not already a User Rights Group by the name of "Application", create one
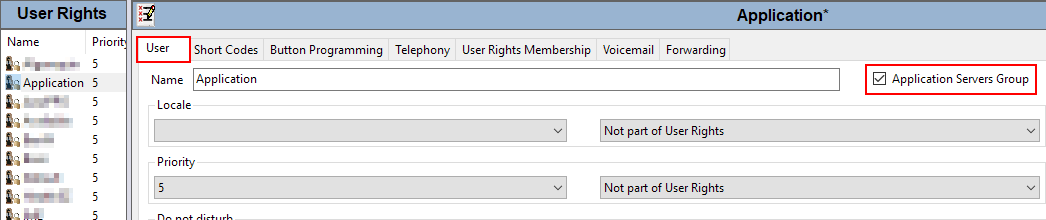
- Under the User tab of that new User Rights Group make sure that the "Application Servers Group" box is checked
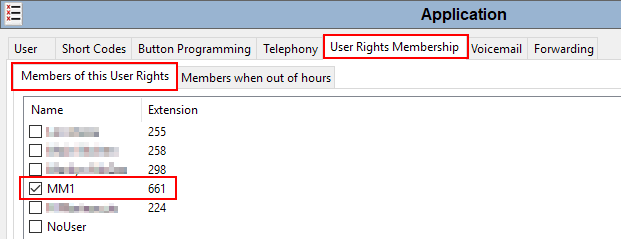
- Select the virtual handset(s) created above in the User Rights Membership > Members of this User Rights tab
- Save your changes
Stacked 3rd-party SIP endpoint licenses
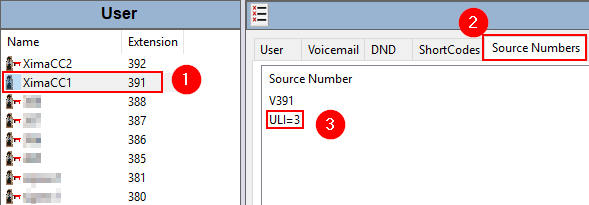
The non-OEM extensions use 3rd-party SIP endpoint licenses and it is up to the client to know how many they have available. To utilize these licenses seamlessly when using more than one license, you need to add "ULI={License Count}" to the “Source Numbers” of the Multimedia User.
- Navigate to the User menu
- Open the Source Numbers tab
- Add
ULI={License Count}to its Source Number list- NOTE: You can add up to 5 licenses per User, and the number of licenses an extension is assigned should match the number of 3rd Party SIP Endpoint licenses the WebLM has been provided.
- You can see in the image below that extension 391 is set up to have three licenses under its Source Numbers
- Save your changes
- NOTE: Sometimes a PBX reboot is required to recognize the license change and to allow the registration
Hunt Group
Purpose: Create a Hunt Group in Avaya IP Office. This group is created to route calls to the provisioned IP Office Users and failover if necessary.
- Go to the Groups menu
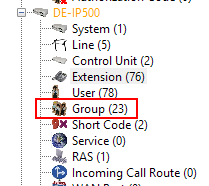
- Right-click on Group and select "New"
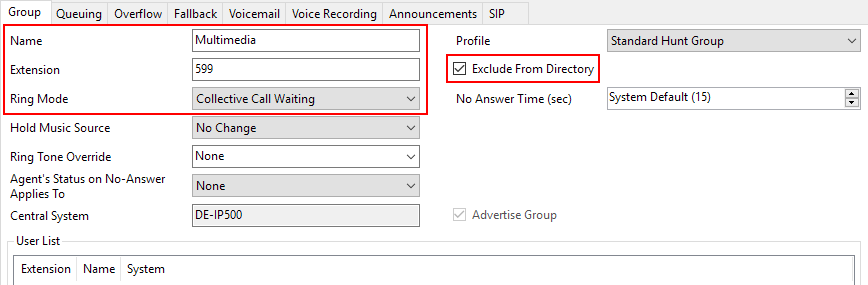
- Create a new Group Name. In this example, we chose "Multimedia"
- Provide an appropriate Extension number
- Set Ring Mode to "Collective Call Waiting" and check the "Exclude From Directory" box
-
Place all virtual handsets previously created within this group's User List by selecting "Edit"
-
Those virtual handsets created in the User and Extension section above
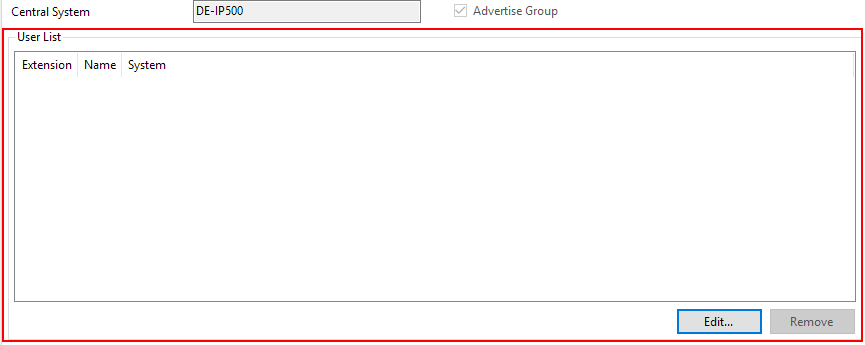
-
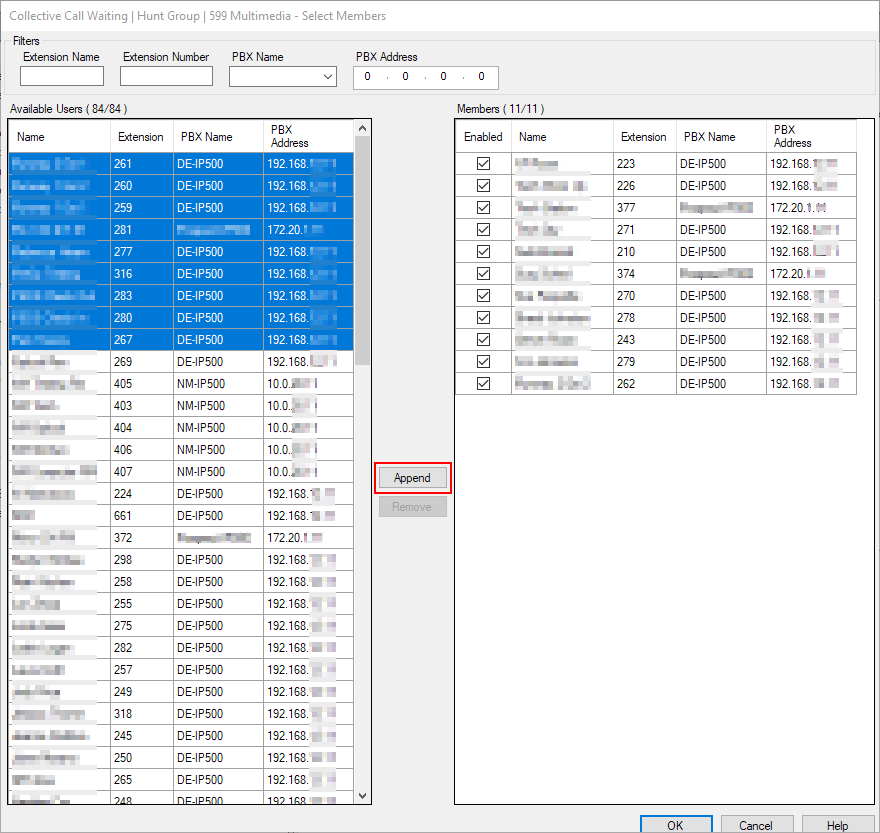
- Select all virtual handsets that you want in this Hunt Group and use the Append button to place them into the Contact Center (Multimedia) Hunt Group
- Under the Queuing tab, please deselect the Queuing On box

- Under the Voicemail tab disable voicemail by deselecting Voicemail On

- For resiliency, go to the Overflow tab and choose an appropriate destination for calls to overflow to should the virtual handsets become fully utilized, unregistered, or the Contact Center (Multimedia) service fails
- Set Overflow Time (sec) to 2 seconds
- Set Overflow Mode to "Group"
- Set Immediate Overflow to "Off"
- Select Add... and configure which Hunt Group you would like as the Overflow group
- In the example below, we added the Appointment Hunt Group as our Overflow group

- In the example below, we added the Appointment Hunt Group as our Overflow group
- Press OK to register these changes
NOTE: You can also create a manual fallback option for one of your Users in order to bypass Contact Center (Multimedia) and only use Hunt Groups. This is useful during planned outages and for diagnosing issues with Chronicall/ACR that might require a service restart.
Incoming Call Route
Purpose: Create an Incoming Call Route to direct calls to Voicemail Pro. If you already have an Incoming Call Route you'd like to use then you may skip this step.
- Go to the Incoming Call Route menu and select an Incoming Call Route or create a new one

- In the Destinations tab, under the Destination field, type in the name you want (in our example we chose "VM:Multimedia") then hit OK

- Once these settings are configured, save and reboot the IP Office
Voicemail Pro
Create a Module
Purpose: Create a Call Flow entitled "Multimedia". If you already have a module that you'd like to use then you may skip this step.
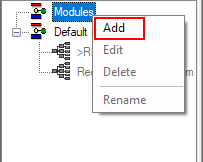
- Right-click on Modules and select Add
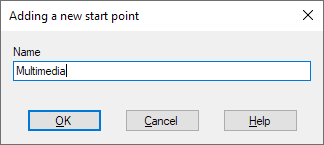
- A new window will appear with the heading "Adding a new start point". Type "Multimedia" in the name field and hit OK
Menu Configuration
Purpose: Create a Menu in order to get callers to Contact Center (Multimedia) and route them to the desired skill. You can use a module of your choice or the module created above.
- Select "Basic Actions"
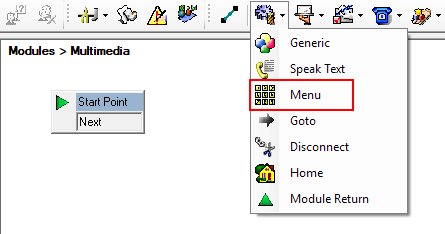
- Select "Menu" and drag it onto the screen
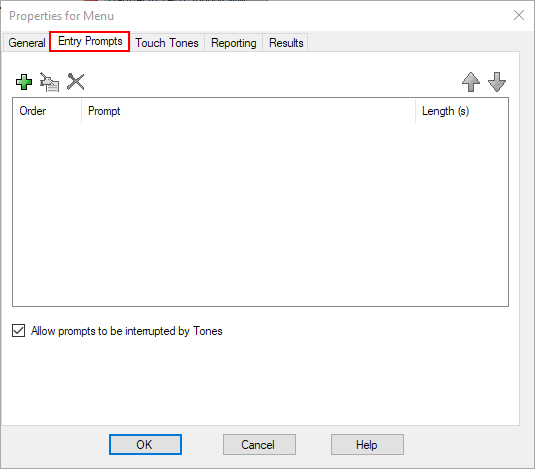
- Double-click this new menu and create a greeting under the Entry Prompts tab whereby you greet the caller and provide them a menu, or Auto Attendant options
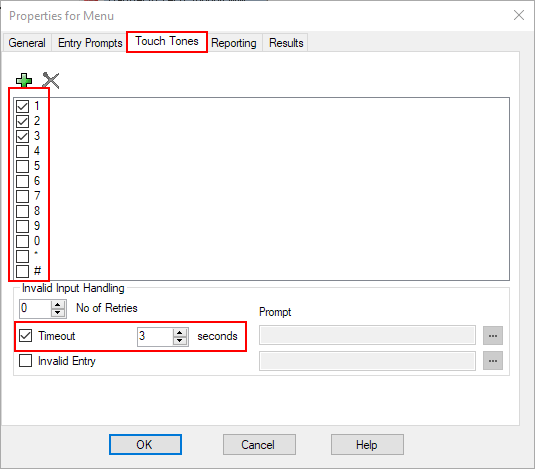
- Under the Touch Tones tab create your Menu options with at least 1 Touch-Tone selection
- We also recommend selecting the Timeout box and putting an appropriate time in seconds
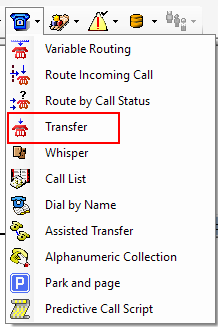
- For example, if the Auto Attendant's entry prompt is to "Press ‘1’ for ‘Tech Support’", please create a Transfer action from the Telephony Actions menu
- NOTE: Assisted Transfers are NOT supported
- In the event the virtual handset(s) are not answering, the overflow needs to be configured at the Hunt Group level of IP Office (please see the Hunt Group section above)
- The use of Assisted Transfers will result in inaccurate call logging and missed recordings
- NOTE: Assisted Transfers are NOT supported
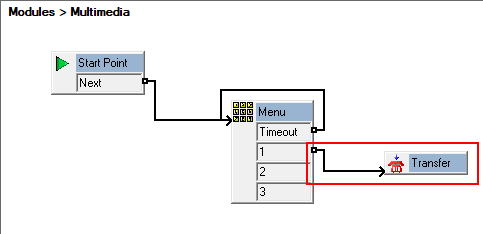
- Place the Transfer action into the call flow and link the Menu option 1 to the Transfer action
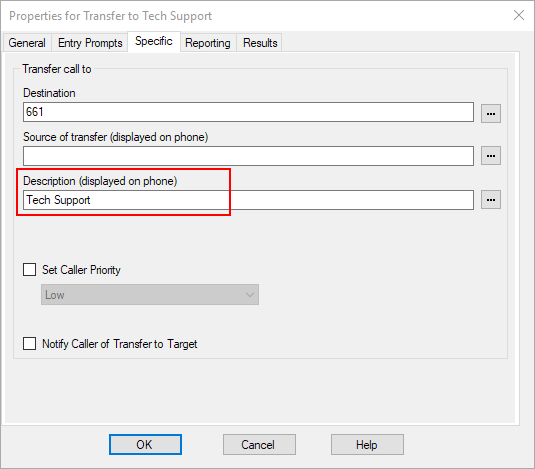
- Inside the Transfer action
- In the General tab you can change the Token Name to better represent the transfer (e.g. "Transfer to Tech Support")

- Under the Specific tab:
- In the Destination field, enter in the Hunt Group extension created earlier for Contact Center (Multimedia) (in following our example Extension 661)
- Leave the Source field blank otherwise this will interfere with call logging
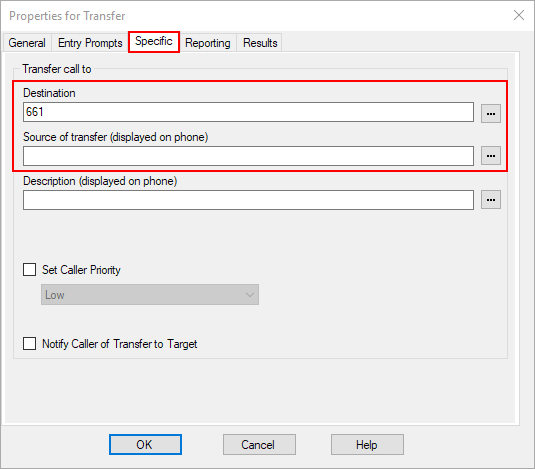
- In the Description (displayed on phone) field, enter the name of the Contact Center (Multimedia) Skill group tag that this call should be routed to. Write down what you put here as you will use it when you program your Contact Center (Multimedia) Skills within Chronicall
- The Description field is case sensitive so make sure it matches exactly!
- In the Destination field, enter in the Hunt Group extension created earlier for Contact Center (Multimedia) (in following our example Extension 661)
- In the General tab you can change the Token Name to better represent the transfer (e.g. "Transfer to Tech Support")
- Repeat Step 8 for each Contact Center (Multimedia) Skill group with different menu selections until you have created all necessary transfer actions
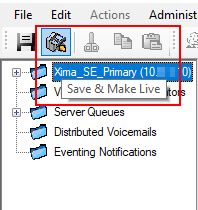
- When setup is complete be sure to use the "Save & Make Live" option to implement your changes
Chronicall Settings
SIP Extensions
Purpose: Configure Contact Center (Multimedia) to register with the IP Office Users configured earlier.
- Open Chronicall and navigate to Admin (System) > System Settings
- Expand Multimedia/Contact Center Voice Seat and select SIP Extensions

- The SIP Extensions window will appear. Enter the User profile extensions created in Avaya IP Office under the SIP Extension field and the corresponding password from the same User extensions in the Password field
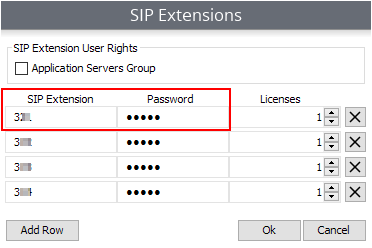
- If you have stacked licenses adjust the Licenses number to the appropriate amount and make sure that "Application Servers Group" is selected
- Press OK
- Select the Save button
- A Multimedia service restart will be needed after completion to initiate the registration request
Be sure to test your SIP extensions to ensure they are registered with Contact Center (Multimedia)!
- NOTE: If you have issues with the handsets not registering please refer to this article.